really!

really!
Thank you: reddit
“Just got my pair of ORP2, the standard EQ is too tinny and paper thin.
This is what I’ve landed and now it sounds more full-bodied, clearer with more bass.”
Give this a try:
125Hz: +5
400Hz: +4
1.2kHz: -4
3kHz: -3
10kHz: +3
“I was also surprised at how much better the vocals sounded by dialling down the mids – I read on a review that the mids were quite boosted by default.”
“Just got my pair ~ and immediately tried out this EQ – huge difference. Vocals sound much more natural and they sound much more like a standard pair of headphones now. Thanks!”
dito…
Consider using his plugin by default:
https://wordpress.org/plugins/index-wp-mysql-for-speed/
You only have to run it once, to create better indexing keys on the database tables, which in my eyes should be default in WordPress.
Unbelievable what I see in speed performance so far!
(Found this plugin actually by following the steps in this blog article for a client.)
But wait, there is more!
https://www.plumislandmedia.net/wordpress/performance/optimizing-wordpress-database-servers/
Note to self: https://github.com/Vaskivskyi/ha-asusrouter/issues/993
If you can connect to the container, run pip show asusrouter and confirm that somehow it is not of version 1.21.0
pip show asusrouter
If you can connect to the container, try installing the dependency manually with pip install asusrouter==1.21.0. If you get any errors, post them here, please. Package installation issues might be related to the other custom integrations and their dependencies.
pip install asusrouter==1.21.0
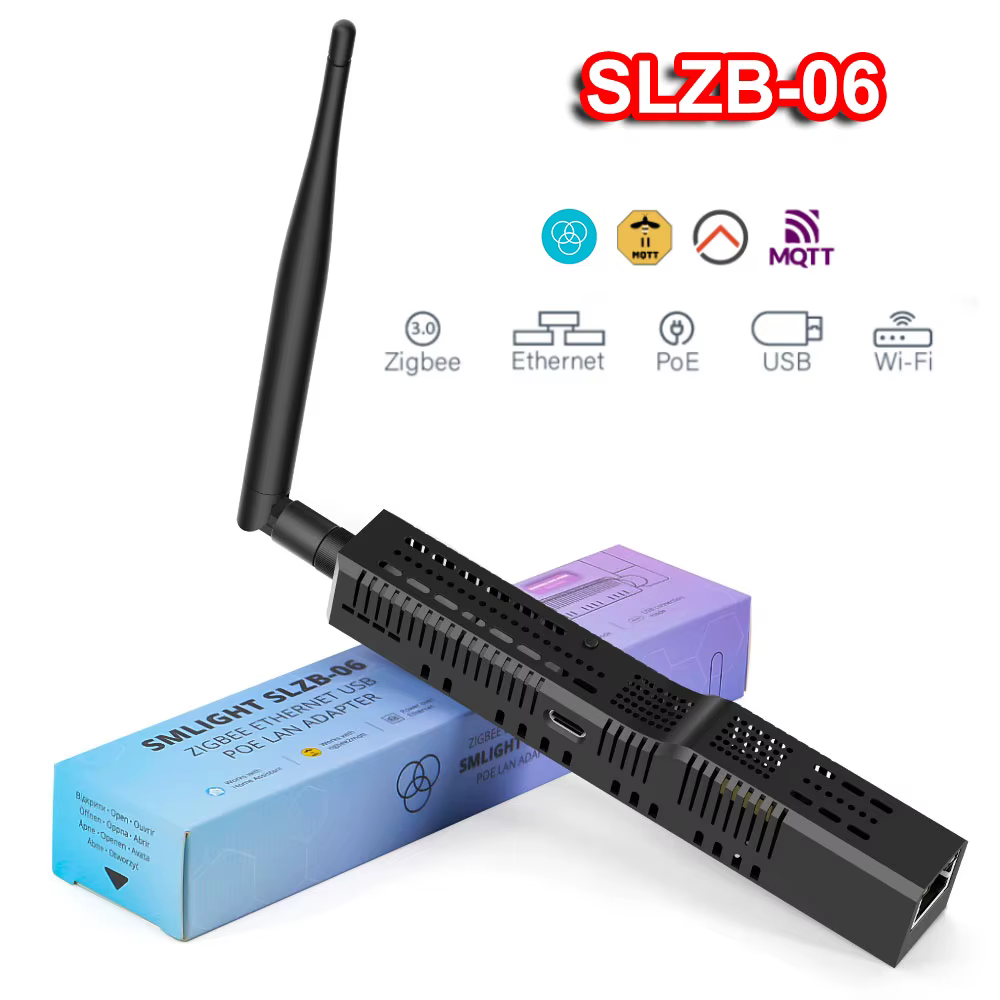
My wifi is not slow at all, but I started getting more and more connection problems from random devices. The solution for me was to replace some wifi devices with zigbee versions.
I started with adding a SMLIGHT SLZB-06 to my network. This is a Zigbee 3.0 to Ethernet USB WiFi Gateway Coordinator with PoE and it works with Home Assistant using ZHA or Zigbee2MQTT.
So I gave it a fixed IP address, and on my NAS, where Home Assistant is running in a Docker container, I installed eclipse-mosquitto and koenkk/zigbee2mqtt. Next I added the SMLIGHT SLZB-06 and MQTT integration in Home Assistant and everything started coming together and working like a charm.
First added devices were temperature and humidity sensors, Sonoff SNZB-02P and SNZB-02D. Next I started adding smart plugs Sonoff S60ZBTPF and IHOMECAM Smart power plugs, replacing my HomeWizard wifi energy sockets.
And guess what? With more devices on zigbee, my wifi is stable again and I get a lot more data out of my smart home!
That’s all folks!
Have a nice day…

We are live!
the project: https://meetjestad.net/
info: https://meetjestad.net/node/1084
data: https://meetjestad.net/data/sensors_recent.php?sensor=1084&limit=12
json: https://meetjestad.net/data/?type=sensors&ids=1084&format=json&limit=1
Utrecht: https://meetjestad.net/index3.php?loc=Ut
RIVM: https://samenmeten.rivm.nl/dataportaal/sensor_dashboard.php?kit_id=MJS_1084#tabs-2
Of course I wanted to add the data to my own Home Assistant installation. For this I had to add some custom sensors to:
\\NAS\docker\homeassistant\config\configuration.yaml
rest:
  - resource: "https://meetjestad.net/data/?type=sensors&ids=1084&format=json&limit=1"
    scan_interval: 00:15:00
    sensor:
      - name: "mjs_1084_humidity"
        unique_id: mjs_1084_humidity
        value_template: '{{ (value_json[0].humidity | float) | round(1) }}'
        device_class: humidity
        state_class: measurement
        unit_of_measurement: "%"
        availability: '{{ ((value_json[0].humidity | float) >= 0) and ((value_json[0].humidity | float) <= 100) }}'
      - name: "mjs_1084_temperature"
        unique_id: mjs_1084_temperature
        value_template: '{{ (value_json[0].temperature | float) | round(1) }}'
        device_class: temperature
        state_class: measurement
        unit_of_measurement: "°C"
        availability: '{{ ((value_json[0].temperature | float) > -25) and ((value_json[0].temperature | float) < 100) }}'
      - name: "mjs_1084_pm25"
        unique_id: mjs_1084_pm25
        value_template: '{{ (value_json[0]["pm2.5"] | float) | round(0) }}'
        device_class: pm25
        state_class: measurement
        unit_of_measurement: "µg/m³"
        availability: '{{ ((value_json[0]["pm2.5"] | float) >= 0) and ((value_json[0]["pm2.5"] | float) < 50000) }}'
      - name: "mjs_1084_pm10"
        unique_id: mjs_1084_pm10
        value_template: '{{ (value_json[0].pm10 | float) | round(0) }}'
        device_class: pm10
        state_class: measurement
        unit_of_measurement: "µg/m³"
        availability: '{{ ((value_json[0].pm10 | float) >= 0) and ((value_json[0].pm10 | float) < 50000) }}'
      - name: "mjs_1084_battery_voltage"
        unique_id: mjs_1084_battery_voltage
        value_template: '{{ (value_json[0].supply | float) | round(2) }}'
        device_class: voltage
        state_class: measurement
        unit_of_measurement: V
      - name: "mjs_1084_timestamp"
        unique_id: mjs_1084_timestamp
        device_class: timestamp
        value_template: "{{ strptime( value_json[0].timestamp ~ '+00:00' , '%Y-%m-%d %H:%M:%S%z') }}"
* Please note some changes I made, compared to the instructions I found here. The following does not work:
value_template: '{{ (value_json[0].pm2.5 | float) }}'I had to use:
value_template: '{{ (value_json[0]["pm2.5"] | float) | round(0) }}'* I added the timestamp as a sensor as well, so I could see when the last data packet was transmitted. For the timestamp, the following did not quite work. It just gave me the UTC time:
value_template: "{{ value_json[0].timestamp | as_datetime | as_local }}"So, I had to add some string manipulation to get the data in the correct timezone:
value_template: "{{ strptime( value_json[0].timestamp ~ '+00:00' , '%Y-%m-%d %H:%M:%S%z') }}"* And to filter out invalid data, like temperature at -26 or pm at over 50k, I had to add some availability filters, like so:
availability: '{{ ((value_json[0].pm10 | float) >= 0) and ((value_json[0].pm10 | float) < 50000) }}'That’s all folks…
Have a nice day!